• Skip to primary navigation
  • Skip to main content
  • Skip to primary sidebar

Yellow Bricks

by Duncan Epping

  • Home
  • Unexplored Territory Podcast
  • HA Deepdive
  • ESXTOP
  • Stickers/Shirts
  • Privacy Policy
  • About
  • Show Search
Hide Search

vSphere

What’s new vSAN 6.7

Duncan Epping · Apr 17, 2018 ·

As most of you have seen, vSAN 6.7 just released together with vSphere 6.7. As such I figured it was time to write a “what’s new” article. There are a whole bunch of cool enhancements and new features, so let’s create a list of the new features first, and then look at them individually in more detail.

  • HTML-5 User Interface support
  • Native vRealize Operations dashboards in the HTML-5 client
  • Support for Microsoft WSFC using vSAN iSCSI
  • Fast Network Failovers
  • Optimization: Adaptive Resync
  • Optimization: Witness Traffic Separation for Stretched Clusters
  • Optimization: Preferred Site Override for Stretched Clusters
  • Optimization: Efficient Resync for Stretched Clusters
  • New Health Checks
  • Optimization: Enhanced Diagnostic Partition
  • Optimization: Efficient Decomissioning
  • Optimization: Efficient and consistent storage policies
  • 4K Native Device Support
  • FIPS 140-2 Level 1 validation

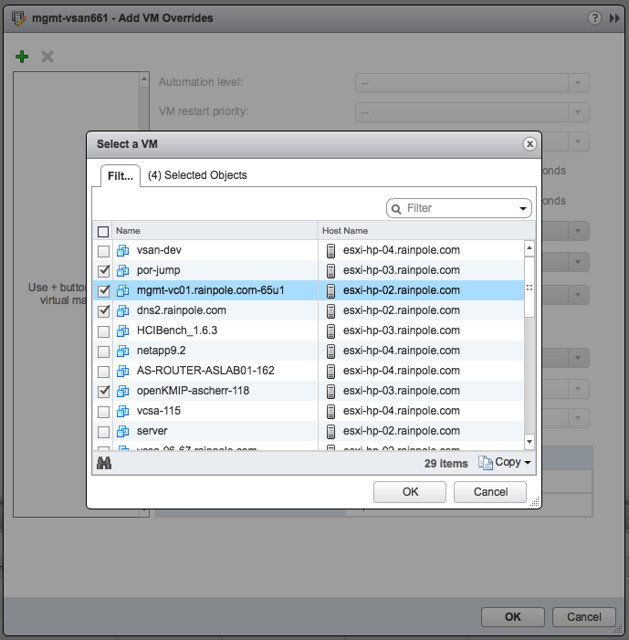
Yes, that is a relatively long list indeed. Lets take a look at each of the features. First of all, HTML-5 support. I think this is something that everyone has been waiting for. The Web Client was not the most loved user interface that VMware produced, and hopefully the HTML-5 interface will be viewed as a huge step forward. I have played with it extensively over the past 6 months and I must say that it is very snappy. I like how we not just ported over all functionality, but also looked if workflows could be improved and if presented information/data made sense in each and every screen. This also however does mean that new functionality from now on will only be available in the HTML-5 client, so use this going forward. Unless of course the functionality you are trying to access isn’t available yet, but most of it should be! For those who haven’t seen  it yet, here’s  a couple of screenshots… ain’t it pretty? 😉

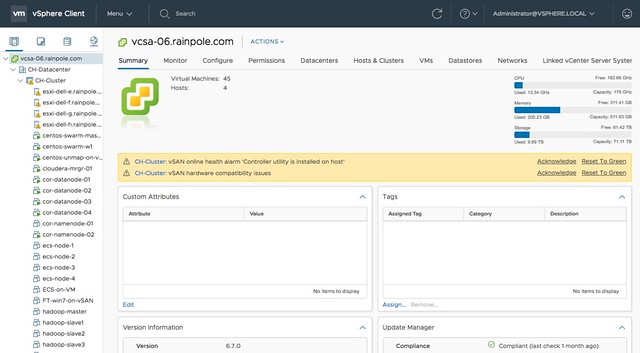
For those who didn’t notice, but in the above screenshot you actually can see the swap file, and the policy associated with the swap file, which is a nice improvement!

The next feature is native vROps dashboards for vSAN in the H5 client. I found this very useful in particular. I don’t like context switching and this feature allows me to see all of the data I need to do my job in a single user interface. No need to switch to the VROps UI, but instead vSphere and vSAN dashboards are now made available in the H5 client. Note that it needs the VROps Client Plugin for the vCenter H5 UI to be installed, but that is fairly straight forward.

Next up is support for Microsoft Windows Server Failover Clustering  for the vSAN iSCSI service. This is very useful for those running a Microsoft cluster. Create and iSCSI Target and expose it to the WSFC virtual machines. (Normally people used RDMs for this.) Of course this is also supported with physical machines. Such a small enhancement, but for customers using Microsoft clustering a big thing, as it now allows you to run those clusters on vSAN without any issues.

Next are a whole bunch of enhancements that have been added based on customer feedback of the past 6-12 months. Fast Network Failovers was one of those. Majority of our customers have a single vmkernel interface with multiple NICs associated with them, some of our customers have a setup where they create two vmkernel interfaces on different subnets, each with a single NIC. What that last group of customers noticed is that in the previous release we waited 90 seconds before failing over to the other vmkernel interface (tcp time out) when a network/interface had failed. In the 6.7 release we actually introduce a mechanism that allows us to failover fast, literally within seconds. So a big improvement for customers who have this kind of network configuration (which is very similar to the traditional A/B Storage Fabric design).

Adaptive Resync is an optimization to the current resync function that is part of vSAN. If a failure has occurred (host, disk, flash failure) then data will need to be resynced to ensure that the impacted objects (VMs, disks etc) are brought in to compliance again with the configured policy. Over the past 12 months the engineering team has worked hard to optimize the resync mechanism as much as possible. In vSAN 6.6.1 a big jump was already made by taking VM latency in to account when it came to resync bandwidth allocation, and this has been further enhanced in 6.7. In 6.7 vSAN can calculate the total available bandwidth, and ensures Quality Of Service for the guest VMs prevails by allocating those VMs 80% of the available bandwidth and limiting the resync traffic to 20%. Of course, this only applies when congestion is detected. Expect more enhancements in this space in the future.

A couple of release ago we introduced Witness Traffic Separation for 2 Node configurations, and in 6.7 we introduce the support for this feature for Stretched Clusters as well. This is something many Stretched vSAN customers have asked for. It can be configured through the CLI only at this point (esxcli) but that shouldn’t be a huge problem. As mentioned previously, what you end up doing is tagging a vmknic for “witness traffic” only. Pretty straight forward, but very useful:

esxcli vsan network ip set -i vmk<X> -T=witness

Another enhancement for stretched clusters is Preferred Site Override. It is a small enhancements, but in the past when the preferred site failed and returned for duty but would only be connected to the witness, it could happen that the witness would bind itself directly to the preferred site. This by itself would result in VMs becoming unavailable. This Preferred Site Override functionality would prevent this from happening. It will ensure that VMs (and all data) remains available in the secondary site. I guess one could also argue that this is not an enhancement, but much more a bug fix. And then there is the Efficient Resync for Stretched Clusters feature. This is getting a bit too much in to the weeds, but essentially it is a smarter way of bringing components up to the same level within a site after the network between locations has failed. As you can imagine 1 location is allowed to progress, which means that the other location needs to catch up when the network returns. With this enhancement we limit the bandwidth / resync traffic.

And as with every new release, the 6.7 release of course also has a whole new set of Health Checks. I think the Health Check has quickly become the favorite feature of all vSAN Admins, and for a good reason. It makes life much easier if you ask me. In the 6.7 release for instance we will validate consistency in terms of host settings and if an inconsistency is found report this. We also, when downloading the HCL details, will only download the differences between the current and previous version. (Where in the past we would simply pull the full json file.) There are many other small improvements around performance etc. Just give it a spin and you will see.

Something that my team has been pushing hard for (thanks Paudie) is the Enhanced Diagnostic Partition. As most of you know when you install / run ESXi there’s a diagnostic partition. This diagnostic partition unfortunately was a fixed size, with the current release when upgrading (or installing green field) ESXi will automatically resize the diagnostic partition. This is especially useful for large memory host configurations, actually useful for vSAN in general. No longer do you need to run a script to resize the partition, it will happen automatically for you!

Another optimization that was released in vSAN 6.7 is called “Efficient Decomissioning“. And this is all about being smarter in terms of consolidating replicas across hosts/fault domains to free up a host/fault domain to allow for maintenance mode to occur. This means that if a component is striped, for other reasons then policy, they may be consolidated. And the last optimization is what they refer to as Efficient and consistent storage policies. I am not sure I understand the name, as this is all about the swap object. Per vSAN 6.7 it will be thin provisioned by default (instead of 100% reserved), and also the swap object will now inherit the policy assigned to the VM. So if you have FTT=2 assigned to the VM, then you will have not two but three components for the swap object, still thin provisioned so it shouldn’t really change the consumed space in most cases.

Then there are the two last items on the list: 4K Native Device Support and FIPS 140-2 Level 1 validation. I think those speak for itself. 4K Native Device Support has been asked for by many customers, but we had to wait for vSphere to support it. vSphere supports it as of 6.7, so that means vSAN will also support it Day 0. The ​VMware VMkernel Cryptographic Module v1.0 has achieved FIPS 140-2, vSAN leverages the same module for vSAN Encryption. Nice collaboration by the teams, which is now showing the big benefit.

Anyway, there’s more work to do today, back to my desk and release the next article. Oh, and if you haven’t seen it yet, Virtual Blocks also has a blog and there’s a nice podcast on the topic of 6.7 as well.

vSphere HA Restart Priority

Duncan Epping · Apr 4, 2018 ·

I’ve seen more and more questions popping up about vSphere HA Restart Priority lately. I figured I would write something about it. I already did in this post about what’s new in vSphere 6.5 and I did so in the Stretched Cluster guide. It has always been possible to set a restart priority for VMs, but pre-vSphere 6.5 this priority simply referred to the scheduling of the restart of the VM after a failure. Each host in a cluster can restart 32 VMs at the same time, so you can imagine that if the restart priority is only about VM restarts that it doesn’t really add a lot of value. (Simply because we can schedule many at the same time, and the priority would as such have no effect.)

As of vSphere 6.5 we have the ability to specify the priority and also specify when HA should continue with the next batch. Especially this last part is important, as this allows you to specify that we start with the next priority level when:

  1. Resources are allocated (default)
  2. VMs are powered on
  3. Guest heartbeat is detected
  4. App heartbeat is detected

I think these are mostly self-explanatory, note though the “resources are allocated” means that a target host for restart has been found by the master. So this happens within milliseconds. Very similar for VMs are powered on, this also says nothing about when a VM is available. This literally is “power on”. In some cases it could take 10-20 seconds for a VM to be fully booted and the apps to be available, in other cases it may take minutes… It all depends on the services that will need to be started within the VM. So if it is important for the “service provided” by the VM to be available before starting the next batch then option 3 or 4 would be your best pick. Note that with option 4 you will need to have VM/Application Monitoring and defined within the VM. Now when you have made your choice around when to start the next batch you can simply start adding VMs to a specific level.

Instead of the 3 standard restart “buckets” you now have 5: Highest, High, Medium, Low, Lowest. Why these funny names? Well that was done in order to stay backwards compatible with vSphere 6 / 5 etc. By default all VMs will have the “medium” restart priority, and no it won’t make any difference if you change all of them to high. Simply because the restart priority is about the priority between VMs, it doesn’t change the host response times etc. In other words, changing the restart priority only makes sense when you have VMs at different levels, and usually will only make a big difference when you also change the option “Start next priority VMs when”.

So where do you change this? Well that is pretty straight forward:

  • Click on your HA cluster and then the “Configure” Tab
  • Click on “VM Overrides” and then click “Add”
  • Click on the green plus sign and select the VMs you would like to give a higher, or lower priority
  • Then select the new priority and specify when the next batch should start

And if you are wondering, yes the restart priority also applies when vCenter is not available. So you can use it even to ensure vCenter, AD and DNS are booted up first. All of this info is stored in the cluster configuration data. You can examine this on the commandline by the way by typing the following:

/opt/vmware/fdm/fdm/prettyPrint.sh clusterconfig

Note that the outcome is usually pretty big, so you will have to scroll through it to find what you need, if you do a search on “restartPriority” then you should be able to find it the VMs for which you changed the priority. Pretty cool right?!

Oh, if you didn’t know yet… Frank, Niels and I are actively updating the vSphere Clustering Deep Dive. Hopefully we will have something out “soon”, as in around VMworld.

Disable DRS for a VM

Duncan Epping · Mar 28, 2018 ·

I have been having discussions with a customer who needs to disable DRS on a particular VM. I have written about disabling DRS for a host in the past, but not for a VM, well I probably have at some point but that was years ago. The goal here is to ensure that DRS won’t move a VM around but HA can still restart it. Of course you can create VM to Host rules, and you can create “must rules”. When you create must rules this could lead to an issue when the host on which the VM is running fails as HA will not restart it. Why? Well it is a “must rule”, which means that HA and DRS must comply to the rule specified. But there’s a solution, look at the screenshot below.

In the screenshot you see the “automation level” for the VM in the list, this is the DRS Automation level. (Yes the name will change in the H5 Client, making it more obvious what it is) You add VMs by clicking the green plus sign. Next you select the desired “automation mode” for those VMs and click okay. You can of course completely disable DRS for the VMs which should never be vMotioned by DRS, in this case during contention those “disabled VMs” are not considered at all. You can also set the automation mode to Manual or Partially Automated for those VMs as that gives you at least initial placement, but has as a downside that the VMs are considered for migration by DRS during contention. This could lead to a situation where DRS recommends that particular VM to be migrated, without you being able to migrate it. This in its turn could lead to VMs not getting the resources they require. So this is a choice you have to make, do I need initial placement or not?

If you prefer the VMs to stick to a certain host I would highly recommend to set VM/Host Rules for those VMs, use “should rules”, which define on which host the VM should run. Combined with the new Automation Level this will result in the VM being placed correctly, but not migrated by DRS when there’s contention. On top of that, it will allow HA to restart the VM anywhere in the cluster! Note that with “manual automation level” DRS will ask you if it is okay to place the VM on a certain host, with “partially automated” DRS will do the initial placement for you. In both cases balancing will not happen for those VMs automatically, but recommendations will be made, which you can ignore. (not use “safely”, as it may not be safe)

Doing maintenance on a Two-Node (Direct Connect) vSAN configuration

Duncan Epping · Mar 13, 2018 ·

I was talking to a partner and customer last week at a VMUG. They were running a two node (direct connect) vSAN configuration and had some issues during maintenance which were, to them, not easy to explain. What they did is they placed the host which was in the “preferred fault domain” in to maintenance mode. After they placed that host in to maintenance mode the link between the two hosts for whatever reason failed. After they rebooted the host in the preferred host it connected back to the witness but at this point in time the connection between the hosts had not returned yet. This confused vSAN and that resulted in the scenario where the VMs in the secondary fault domain were powered off. As you can imagine an undesired effect.

This issue is solved in the near future in a new version of vSAN, but for those who need to do maintenance on a two-node (direct connect) configuration (or a full site maintenance in a stretched environment) I would highly recommend the following simple procedure. This will need to be done when doing maintenance on the host which is in the “preferred fault domain”:

  • Change the preferred fault domain
    • Under vSAN, click Fault Domains and Stretched Cluster.
    • Select the secondary fault domain and click the Mark Fault Domain as preferred for Stretched Cluster icon
  • Place the host in to maintenance mode
  • Do your maintenance

Fairly straight forward, but important to remember…

Changing advanced vSphere FT related settings, is that supported?

Duncan Epping · Feb 1, 2018 ·

This week I received a question around changing the values for vSphere FT related advanced settings. This customer is working on an environment where uptime is key. Of course the application layer is one side, but they also want to have additional availability from an infrastructure perspective. Which means vSphere HA and vSphere FT are key.

They have various VMs they need to enable FT on, these are vSMP VMs (meaning in this case dual CPU). Right now each host is limited to 4 FT VMs and at most 8 vCPUs, this is being controlled by two advanced settings called “das.maxftvmsperhost” and “das.maxFtVCpusPerHost”. The values for these are, obviously, 4 and 8. The question was: can I edit these and still have a supported configuration? Also, why 4 and 8?

I spoke to the product team about this and the answer is: yes, you can safely edit these. These values were set based on typical bandwidth and resource constraints customers have. An FT VM easily consumes between 1-3Gbps of bandwidth, meaning that if you dedicate a 10Gbps link to it you will fit roughly 4 VMs. I say roughly as of course the workload matters: CPU, Memory and IO pattern.

If you have a 40Gbps NIC, and you have plenty of cores and memory you could increase those max numbers for FT VMs per host and FT vCPUs. However, it must be noted that if you run in to problems VMware GSS may request you to revert back to the default just to ensure the issues that occur aren’t due to this change as VMware tests with the default values.

UPDATE to this content can be found here: https://www.yellow-bricks.com/2022/11/18/can-you-exceed-the-number-of-ft-enabled-vcpus-per-host-or-number-of-ft-enabled-vcpus-per-vm/

  • « Go to Previous Page
  • Page 1
  • Interim pages omitted …
  • Page 21
  • Page 22
  • Page 23
  • Page 24
  • Page 25
  • Interim pages omitted …
  • Page 159
  • Go to Next Page »

Primary Sidebar

About the Author

Duncan Epping is a Chief Technologist and Distinguished Engineering Architect at Broadcom. Besides writing on Yellow-Bricks, Duncan is the co-author of the vSAN Deep Dive and the vSphere Clustering Deep Dive book series. Duncan is also the host of the Unexplored Territory Podcast.

Follow Us

  • X
  • Spotify
  • RSS Feed
  • LinkedIn

Recommended Book(s)

Advertisements


Copyright Yellow-Bricks.com © 2025 · Log in