I am going to do a couple of blogposts with “basic” workflows using the Web Client. Let me know if you find this useful or not… I will start with deploying the vCenter Server appliance and will assume you all know how to install ESXi. I prefer using the vCenter Server appliance in my lab as I can deploy it in minutes without the need to pre-install an OS etc.
The following steps outline the import process of the vCenter Server appliance.
- Open the vSphere Client
- Click “File – Deploy OVF Template”
- Browse for the OVA file
- Provide a name for the to be imported virtual machine, in our case “vCenter-01”
- Select a datastore where this virtual machine should be stored
- Use the default Disk Format
- Provide the networking details like IP address, DNS, netmask etc.
- Finish the wizard
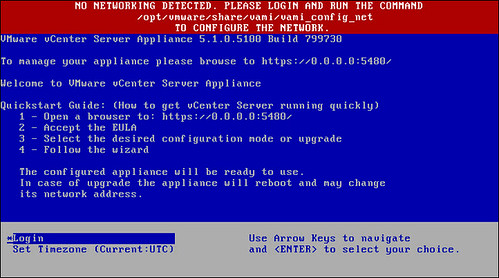
During the reinstallation of my lab environment I ran in to this issue a couple of times. In my environment when I deploy the vCenter Server Virtual Appliance (VCVA) I always got the following error on the remote console:
No Networking Detected
This seems to happen when I point my vSphere Client directly to a host and import the OVA. When you point your vSphere Client directly at a host you do not have the option to fill out the networking details in the OVF wizard. (At least I don’t…) When I point my vSphere Client to a vCenter Server and import the OVA I get the option to fill out the networking details.

You can configure networking fairly simple. Just login to the console and type the following:
/opt/vmware/share/vami/vami_config_net
Make sure to fill out the following sections:
2) Default Gateway
3) Hostname
4) DNS
6) IP Address Allocation for eth0
After this has been done type 1 to exit the configuration tool. Now the VCVA should be configured. In some cases I noticed that the “default gateway” setting did not stick. I would suggest validating this on the network tab of your management console, which can be found here: https://<IP address or DNS name of your vCenter instance>:5480.
Now that you have successfully deployed the vCenter Server appliance you can start exploring the new vCenter Web Client: https://<IP address or DNS name of your vCenter instance>:9443/vsphere-client/