I did not even knew it was possible but on the VMTN Community Forums user PatrickD revealed a workaround to set a different block size for your local VMFS. Of course the question remains why you would want to do this and not create a dedicated VMFS for your Service Console and one for your VMs. Anyway, it’s most definitely a great work around thanks Patrick for sharing this.
There isn’t an easy way of doing that right now. Given that a number of people have asked for it we’re looking at adding it in future versions.
If you want to do this now, the only way to do it is by mucking around with the installer internals (and knowing how to use vi). It’s not that difficult if you’re familiar with using a command line. Try these steps for changing it with a graphical installation:
- boot the ESX installation DVD in text mode
- switch to the shell (Alt-F2)
- ps | grep Xorg
- kill the PID which comes up with something like “Xorg -br -logfile …”. On my system this comes up as PID 590, so “kill 590”
- cd /usr/lib/vmware/weasel
- vi fsset.py
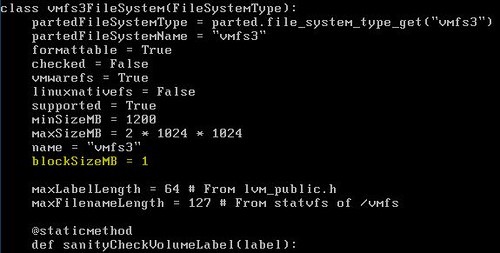
- scroll down to the part which says “class vmfs3FileSystem(FileSystemType):”
- edit the “blockSizeMB” parameter to the block size that you want. it will currently be set to ‘1’. the only values that will probably work are 1, 2, 4, and 8.
- save and exit the file
- cd /
- /bin/weasel
After that, run through the installer as you normally would. To check that it worked, after the installer has completed you can go back to a different terminal (try Ctl-Alt-F3 since weasel is now running on tty2) and look through /var/log/weasel.log for the vmfstools creation command.
Hope that helps.
Thanks Duncan, I know someone who’s been looking for a way to do this for a while now! 🙂
If you have the ability to physically move your disk (and controller) to a machine with an existing “scratch install” of ESX, you can build the VMFS file system with the large block size on it. Then move the disk/controller setup to its intended server and then perform the install. The install should respect the existing VMFS (and retain the larger block size). I recently configured a small text box this with with ESXi on USB and a 1TB SATA.
Hey Duncan,
Great info! I was wondering where this might have been hard coded within the installer. You actually gave me an idea on how one might be able to change the default block size via kickstart but unfortunately we were not able to test since we had some issues in our build environment.
I think you should be able to add the following as a “pre” script to change fsset.py after the ks.cfg is parsed and hopefully before the datastore is created:
%pre –interpreter=bash
sed -i ‘s/blockSizeMB = 1/blockSizeMB = 8/g’ /usr/lib/vmware/weasel/fsset.py
–William Lam
Hi
Another method of changing the blocksize is posted on my blog. It comes down to first installing an extra partition as empty vmfs datastore and then reformat it using vmkfstools.
See my blog: http://www.gabesvirtualworld.com/?p=728
Gabrie
Hi Duncan and everyone
I am not an IT pro. I dont know anything about linux. I would like to know if I do this right. Please be excuse this is a noob question.
I boot the ESX4 install DVD. Then I choose graphical mode. I waited until the first GUI screen which let me click next. I press Alt Ctrl F2 to enter console. I input ps | grep Xorg and get “496 root 88608 S /usr/bin/Xorg -logfile /tmp/X.log :1 vt6 -config /tmp”. So I input kill 496.
cd /usr/lib/vmware/weasel
vi fsset.py
I vi the file and it got a [readonly] tag. I am not able to save the file when I done editing.
Please let me know what part i am doing wrong. Thanks for your time.
Chris
The best solution is to create two virtual disks on your RAID card. They can be in the same RAID group if needed. Make the first one 15GB and the second can consume the rest of the available space of the RAID.
Then install ESX 4 on the first 15GB virtual disk (VD / LUN). Once the install is complete and you have VIC or VCenter connected, add new storage datastore and use the 2nd VD, format it with VMFS and blocksize of your liking (Usually 4MB or 8MB).
The other beauty to this is that you can always reinstall ESX 4 anytime without disrupting your datastore with the VMs.
@Travis Kreikemeier
I tried what you recommend. But after installing esx4 I can’t create e second one by VI Client.
Best regards, Sven
I’ve taken Gabe’s solution above and added it to a kickstart script:
http://www.vreference.com/2010/01/11/create-local-vmfs-with-8mb-block-size-during-esx4-kickstart-install/
Just thought this might help someone.
Forbes.
I too am getting syuck on the Readonly of fsset.py, can anyone advise
My experience is as follows:
ESX 4 Update 1
Dell R710 with 6 drives, raid 5, one Virtual Disk
fsset.py, readonly.. didn’t get a chance to get around that.
Could not find Xorg in the ps list.
My solution was to wipe the raid config and create 2 virtual disks..
Other option was to install ESX on a USB stick (internal slot on Dell r710s) however I need the service console and that requires minimum 9.2GBs which i didn’t have on USB.
Thanks! This step-by-step where really helpful for us!
Andrew, add !
:wq!
Hi,
is that also possible with the ESXi 4.0 Server Version or only with ESX 4.0?
Thanks
I see that VMware has posted about this as well including how to deal with the read-only file.
http://kb.vmware.com/selfservice/microsites/search.do?language=en_US&cmd=displayKC&externalId=1012683
I had the task of setting up ESX 4 for a client recently, and I found the posts here very helpful. I am an MCT MCSE etc. but new to Linux and ESX. I found that the setps here, though correct, were not detailed enough to start from scratch. So I did have to do some extra searching. Basically I got the ESX server setup and virtualised one Server and a second is planned.
I installed the server with the defaults first. This was fine for the testing I did, and virtualising the test server. However when I went to virtualise my clients server, I was told the block size was too small. Searching led me here, and I am greatful to all the contributions found here.
The RAID was already setup by a colligue, one big drive, (Not Ideal and I’ll do it differently next time).
Here’s what I did..
Boot to ESX CDROM
Go to the console:
(In GUI mode press CTRL + ALT + F2)
First thing is to find the PID for Xorg (Capital X)
type: pidof Xorg
eg. Mine was 555
Then end Xorg by typing: kill 555
cd /urs/lib/vmware/weasel
You need to then edit the file in this folder that controls the default block size:
vi fsset.py
(The file is now open and you can scroll down through it with the arrow keys, keep scrolling past similar entries and find this one)
Find: class vmfs3FileSystem(FileSystem)
Edit the blocksize from 1MB to 8MB = Largest
(I didn’t have experience of editing Linux files in a console at all)
to edit, place the cursor under the Number 1 for Block size
Press x to delete the character
Press i to enter insert mode
Then enter the character of your choice. eg. 8
Press ESC to exit insert mode
😡 would normally save a file, but this file is read only, so you need to force a save.
:wg! (forces saving of a read only file)
cd/
/bin/weasel
Now the installation will continue normally with a default block size change (8MB in this example)
I hope this helps someone else who is new to this. I did a little panicing and alot of searching/learning, but thanks again guys for all the help!